Securing Hadoop in the Enterprise: Building Your Threat Model

Beginning the "Securing Hadoop in the Enterprise" Series

This post about general areas of concern when threat modeling Hadoop environments is the beginning of what I expect to be a very long series of articles about architecting, designing, deploying, and operating Hadoop deployments in moderate-to-high security enterprise environments. Hadoop in any environment is a complex topic and I hope to help readers deploy Hadoop securely from the beginning, particularly in enterprise environments which have particular security and operating standards, instead of learning lessons the hard way. This series will start off with higher level concepts to be aware of when designing your deployment, then delve into greater technical detail as we work to configure your clusters.

Threat Modeling

While it is very easy to get wrapped up in the technology behind the Hadoop ecosystem, when developing and implementing a secure Hadoop deployment in the enterprise it is important to first understand your threat model. As with any system it is possible to spend all of your time analyzing all of the potential security problems in Hadoop and its related projects, investigating the security of other applications and how they will integrate with your deployed cluster, and building custom workarounds or compensating controls for them, but no matter how much time or energy you spend no system is perfectly secure and Hadoop is no different. In fact, the complexity of the Hadoop ecosystem belies the very notion of "perfect security" and creates the perfect circumstances for using a threat model to truly understand where you should be focusing your energy in securing your Hadoop deployment.

There are many threat modeling methodologies and resources from which they can be learned (I personally prefer the STRIDE framework), so this article is not going to be about the use of a particular threat modeling framework. Instead, I will be highlighting some areas where I feel deeper discussion in your threat modeling sessions may be required due to the complexities of the Hadoop ecosystem.

Threat Actors

There are many lists of threat actors which can be used generically in threat modeling exercises, but to truly make the most of a threat modeling exercise for a Hadoop environment I believe there are some specific potential threat actors inside your environment which should be analyzed. When analyzing potential insider threat actors, it is important to think through the possibility of an insider acting maliciously or the person's account being compromised by an attacker and being used maliciously.

Cluster Administrators

The first potential threat actor to analyze in any environment is those with administrative privileges of any sort. There are many ways to split administrative duties in a Hadoop environment and how administrative privileges are split should be determined as a result of your threat modeling exercise. Put another way, the threat model should help determine how much of a separation of duties is required between administrative users to satisfy your corporate risk tolerance. When considering these administrators and the specific threat vectors they represent, you should consider a number of factors:

  1. What is the source of these administrators and how extensive is the vetting process for these personnel?
    • This question is particularly important if management of your Hadoop environment is being outsourced to a third-party service provider. While entire books can be written about how to perform proper risk management related to outsourced service providers, it is important to explicitly consider the service provider's hiring model, background check process, project staffing process, and whether or not the service provider will be following your corporate policies and procedures for information system management or if they will be given more latitude to service your environment as they see fit.
  2. Are these administrators trusted enough to have extensive access to data?
  3. Does your Hadoop environment contain data sensitive enough, or contribute to business processes sensitive enough, to require a strict separation of duties?

Keep in mind that each component of the Hadoop ecosystem is developed independently and many have different authorization mechanisms, meaning it is not always possible to enforce a truly strict separation of duties without implementing quite a few compensating controls. More details on this will be included in a future post.

Users/Customers

Depending on the use cases for which your Hadoop environment is being implemented (you do have use cases, right?), there can be many different types of users who may have need to access or use cluster services. The most important thing to remember about these users is that they will be focused on the data and getting their jobs done, not on the system's security controls. When analyzing how users may be interacting with your Hadoop environment, ensure you are addressing all the potential avenues by which a user may interact with the system. What is the severity of the threat to the system if a specific population of users begins using the environment in an unexpected way or gains unauthorized access to a different part of the environment? Focus your security control design on the user populations or parts of the environment where that threat is highest.

As a very simple example, if you have a Hadoop cluster which stores both high sensitivity and low sensitivity information and completely separate user populations access each type of information, you should be focusing the majority of your efforts on ensuring users who should only be able to access the low sensitivity information cannot access the high sensitivity information. From a risk management and resource consumption perspective, this is far more important than ensuring the users accessing high risk data cannot access the low risk data.

External Attackers vs. Insider Threat

The topic of insider threat in the enterprise is getting a lot of attention right now, and rightly so, but I will just add one note here. If an external attacker performs a successful phishing attack against an employee, gains a beachhead inside the corporate network, and begins attacking the network using the employee's user context, what distinguishes this external attacker from an insider?

Access Avenues

The overall number of services within your Hadoop environment is definitely not going to be small, and it will almost certainly grow over time to accommodate proliferating business use cases. Since the flexibility of the Hadoop ecosystem is heavily reliant on the overall architecture of separate services with numerous integration points, there are large numbers of ways in which the system can be accessed. By examining the intended uses of each service and determining the threat posed by illicit access to each of these service interfaces, appropriate risk-based determinations can be made concerning the overall Hadoop environment architecture.

For example, HTTPFS is a service which is meant to provide an interface to end users, so as long as strong authentication and access controls are in place there is little threat to the system in exposing this interface. However, the potential threat to the cluster in exposing the KMS service broadly may be higher since this service should only be available in a programmatic fashion to cluster services.

Summary

The determination of how much effort should be put into placing security controls on a specific Hadoop environment must be highly dependent on the sensitivity of the data in the environment and the business processes which rely on your Hadoop deployment.

Security Monitoring: Security Group vs. System Owner Responsibilities

Role of Information System Owner in Security Monitoring

In small companies and even some medium-sized companies, depending on your definition of medium and the functional divisions in the company, it is possible for a single group of information security workers to monitor for indicators of compromise. This is possible because the infrastructure is small enough, and there are few enough people in the organization, for the information security group to understand everyone's roles and understand what actions are unauthorized and inappropriate across the entire infrastructure. As soon as the organization starts to grow, introducing more roles within the IT infrastructure and more functional divides between groups, it becomes difficult or impossible for a single security group to understand what everyone should be doing everywhere at all times.

Of course, some actions are clearly unauthorized at all times, such as sending sensitive corporate information to an unknown IP address in Myanmar. Other actions, such as an administrator accessing a system during non-business hours, are more difficult for a central security team to assess in large organizations because the separate business units in the company may operate very differently.

With this in mind, it should be clear that the business owners of individual information systems, especially in large organizations, have a responsibility to uphold the security of their systems. Information system owners must be responsible for monitoring for certain security events, detecting indicators of compromise, and activating incident response plans when necessary. Information system owners can especially provide value by monitoring their systems for actions they know to be unusual due to unique characteristics of their systems. For instance, a user known to only need access to a certain dataset suddenly starts querying and downloading other datasets. Outside of the clear access control issues with this scenario, the point is that a central security group would not know which users access which application data for a specific application within a large enterprise. Therefore, the system owner would be responsible for monitoring for this type of unusual behavior.

Examples of Monitoring Responsibilities

The following list provides examples of events for which central information security groups, such as a Security Operations Center (SOC), should be capable of detecting versus events that system owners should be responsible for detecting, with the assumption that the SOC has access to all logs from every information system:

Security Operations Centers should be able to detect:

  • DNS requests for suspicious or known-malicious domains
  • Corporate data exfiltration
  • Network traffic patterns that do not match baseline activity
  • Common application layer attacks, such as SQL injection attempts

Information system owners should be able to detect:

  • Unauthorized actions on individual systems
    • onfiguration changes, especially to critical settings
    • Access attempts, especially successful accesses by authorized administrators but at unauthorized time
  • Unauthorized assignment or elevation of privileges within a system or application
  • Unusual or unauthorized usages of the information system

Exploring System Security Through Question and Answer Panels

How do we effectively and quickly evaluate a system's security posture?

There are many scenarios in which the security of an information system needs to be explored. Perhaps you are an auditor who needs to determine whether or not an information system meets all of the controls detailed in your security framework of choice. Perhaps you are the new CISO at a company and you need to quickly understand the security controls currently deployed in your organization. Finally, maybe you are a security engineer working on the really granular pieces of the system in question and you just feel it's time to take a step back and look more holistically at the system's security architecture.

While there are many ways to perform a security review, one method which tends to evoke positive interactive discussion is an Experts Interview Panel. While it's called an interview panel and can be conducted very formally, it is usually more productive to allow the session to be more of a casual conversation between people who are interested in advancing the security of the environment. Essentially, you gather the people who are most knowledgeable about the information system in question and have them answer questions from other individuals who are experts in security or the technologies used in the information system. Smaller organizations with less mature information security programs may find it valuable to start out by performing this exercise for their entire infrastructure all at once instead of for individual systems or environments

When actually participating in the interview panel and asking questions, it is important to evaluate technical controls but don't forget about the "human factor" of security. Make sure you cover all aspects of information security:

  • Governance: What policies are in place that govern the secure operation and use of the system? Such policies should include:
    • Access control that is governed by the principles of least privilege and separation of duties. The fox should not be guarding the hen house!
    • Strong change and configuration management. Are the authorizations required for each change appropriate? Are all of the potentially affected stakeholders notified of high risk changes?
    • Consistent Auditing. Auditing should on a consistent enough basis to notice indicators of compromise before an attacker can cover their tracks or cause damage to the system.
  • Procedures: Do the procedures that are used in day-to-day operations always take into account the best interests of the information system's security?
    • Do changes include documented install, test, and backout plans? Before an engineer begins a change, do they know how to fix anything that goes wrong and restore services?
    • Can you tell if an unauthorized individual accessed the system?
    • Would you notice if an unauthorized change were made to the system?
  • Technical controls: This is what many people think of as the "fun stuff," but it is certainly not the only component of information security.
    • Are communications sessions encrypted?
    • How is data at rest protected?
    • Are any advanced system integrity controls are in place? Are you hashing system files daily to know if they have changed or using application whitelisting software on the servers?

Participating in the Interview Panel

Ask the Basics to Assess the System's Threat Profile

It is important to understand the threat profile of your system in order to more effectively assess security controls. Ask questions to figure out where the highest risk portions of the system are and perform threat modeling activities:

  • Is the system accessible from the Internet?
  • Is the system accessible from most, or all, of the internal network?
  • Does the system use privileged credentials which provide access to other systems?
  • How attractive of a target is the system? Does it hold critical data or perhaps control access to other systems of interest?

Lay the Groundwork

Can the experts easily enumerate the controls that are in place to ensure an information system's confidentiality, integrity, and availability? The experts should also be able to quickly explain how they have implemented the basics of access control: authentication, authorization, and accounting.

Do not spend a lot of time on this unless there are clearly gaping holes in the security controls. These are the basics that the system experts should be able to discuss off-hand, but you are also likely to receive the same answers that the experts give to anyone who asks about security. This panel is about making people think outside of the box about their security posture.

Use Scenario-Based Questions to Make People Think Differently

Engineers who work very closely with systems often get stuck in certain mindsets. They believe their systems are secure or that they know all of the potential threats and methods of attack. However, there are often pieces of that puzzle missing. Proposing a scenario and asking how the  controls currently in place would prevent or detect the security incident forces people to think more creatively about these problems.

  • If an attacker initiated an unauthorized privilege escalation, how would you detect and respond to that?
  • If an attacker gained unauthorized access to the system by compromising a privileged account, how would you detect and respond to that? How is this scenario prevented in the first place?
  • If a rogue administrator were to change the baseline system configuration, how would that be detected? This question could of course be more specific, as in "would anyone notice if encrypted communications were turned off or if the Administrators group suddenly had another user?"
  • If a compromise did occur, would the attacker quickly have access to other systems? In other words, can this system be used as a pivot point in the network to cross boundaries or can the account credentials used to access this system be used to access other systems?
  • Once an attacker gains a foothold in the system and begins to exfiltrate data, would this activity be detected?

Additionally, it can be very effective to ask an engineer to think like an attacker:

  • If you were outside of the organization and wanted to steal information from this system, how would you do it?
  • If you were a regular user inside of the organization and you wanted to compromise this system, how would you do it?

Default Encryption Settings and Behaviors for OneNote 2013 (Office 365)

OneNote-lock.jpg

Context: Encryption for Office Products

In the beginning of password protection features for Microsoft Office products, protection was poorly implemented and nearly trivial to crack. Over the years, protections were improved. In Office 2007, the state of protection improved significantly when AES became the default cipher for encrypting documents. Since then, incremental improvements have brought us to the state of Office document protection today.

Office 365 Encryption Settings and Behavior for OneNote 2013

This post will examine the default settings and behaviors for the encryption of OneNote 2013 notebook sections when OneNote has been installed as part of Office 365 Home.

Although this Microsoft TechNet post purports to discuss Office 2013 encryption settings, it is clearly out of date. It states that the default encryption algorithm in use is AES with a 128-bit key length. However, I found this to not be the case. Let's examine more closely below.

Clear-Text Sections

The following is a screenshot of the format of a clear-text OneNote section as viewed in Notepad++.

As shown in the side-by-side comparison, it is trivial to pull the content from a clear-text section of OneNote.

Password Protect a OneNote Section

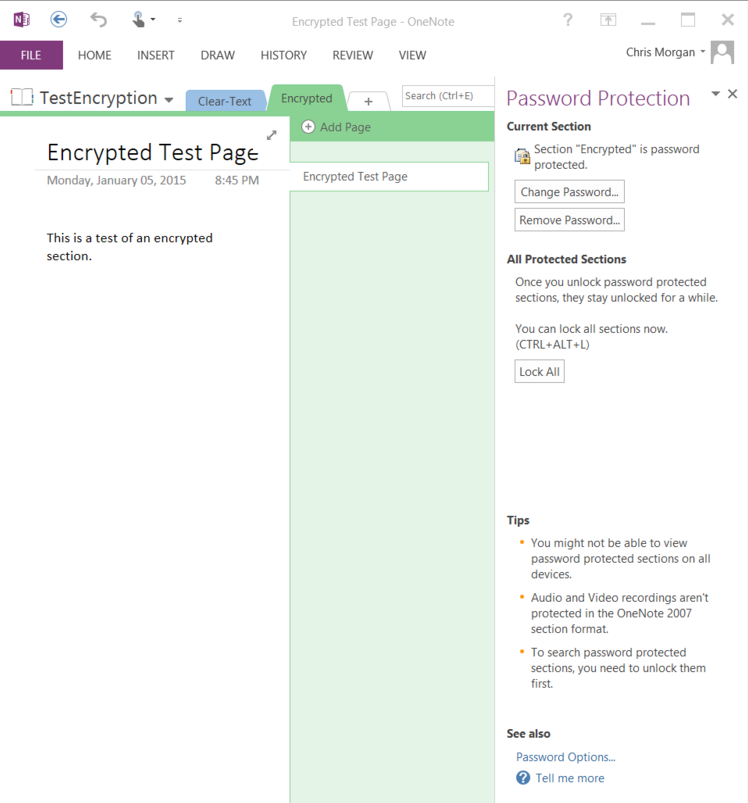
If encryption is desired for a OneNote section, right-click the tab for the section, then select "Password Protect This Section..." This will open the Password Protection dialog, which will allow you to set the initial password, then change or remove that password once the section has been protected. While this is benignly called "Password Protection," the actual action that is occurring is a little more complex. The entire section is being encrypted so that is can be stored securely in the filesystem.

Encrypted Section.PNG

Default Encryption Settings for OneNote 2013

As is clearly shown in the screenshot below and described in the TechNet article above, OneNote 2013 is using AES as the cipher algorithm for encryption OneNote sections. However, it is also clear that the key length is set to 256 bits, which is contrary to the defaults noted in the TechNet article.

Remember that the new Office document formats are based on XML, so the snippet of settings shown in the screenshot above are actually in XML format. The full string of encryption settings for the OneNote section is here (formatted with each element split out to make it slightly more readable):

<encryption xmlns="http://schemas.microsoft.com/office/2006/encryption" xmlns:p="http://schemas.microsoft.com/office/2006/keyEncryptor/password" xmlns:c="http://schemas.microsoft.com/office/2006/keyEncryptor/certificate">

<keyData saltSize="16" blockSize="16" keyBits="256" hashSize="64" cipherAlgorithm="AES" cipherChaining="ChainingModeCBC" hashAlgorithm="SHA512" saltValue="LN7TixtxYaLw+KPpE9Fu/Q=="/> <keyEncryptors>

<keyEncryptor uri="http://schemas.microsoft.com/office/2006/keyEncryptor/password">

<p:encryptedKey spinCount="100000" saltSize="16" blockSize="16" keyBits="256" hashSize="64" cipherAlgorithm="AES" cipherChaining="ChainingModeCBC" hashAlgorithm="SHA512" saltValue="Wlbbi96Vg205rxotlDJ0yQ==" encryptedVerifierHashInput="FnwLq7c4yJnWKWSlTk9p6w==" encryptedVerifierHashValue="um/vjrbuSS0l2Adr1KS0EHL8V1DAwnOrpOG3t385ah35Fg/KdZ648F/eY6I+KwJUgv8kPwZZmJdVc8vf1DLECA==" encryptedKeyValue="AJzGS4z0YDQvnNhCH6fFIQUoPZWP3BGqY9sgiajybiQ="/>

</keyEncryptor></keyEncryptors></encryption>

There are a few items to note from this string of encryption settings:

  • First, the settings being employed are AES-256 in CBC mode, using SHA-512 for any hashing operations performed during the encryption. At the time of this writing, these default cipher and hash algorithms are essentially state of the art in terms of the cryptography being commonly used in the industry. Although SHA-3 is now available, it is not commonly employed yet, and SHA-512 is a very strong hashing algorithm.
  • Second, there is a right way to generate encryption keys and many wrong ways to generate encryption keys. Microsoft has appeared to create a method of properly and securely generating keys with which to encrypt documents from the Office suite. Passwords are not simply hashed once then used as a key for the cipher, which would open up the document encryption to rainbow table attacks that have pre-generated hashes for passwords. Instead, passwords are combined with a salt and hashes are iterated many times over.
  • All attributes which are randomly generated or result from encryption processes, such as the saltValue and encryptedKeyValue attributes, are base64-encoded for storage. Therefore, any usage of these values must be preceded by base64 decoding.

Encryption Process for Office 2013 Documents

Office 2013 documents adhere to Microsoft's ECMA-376 Document Encryption standard.

Using the encryption settings described in the XML string, we can determine that the encryption process used for this OneNote 2013 section more specifically worked as such (slightly simplified for readability):

  1. The user's password was combined with a randomly generated salt of 16 bytes.
  2. This (salt + password) was hashed using the algorithm specified in the hashAlgorithm attribute of the "p:encryptedKey" element under the "keyEncrypter" element. In this case, that algorithm was SHA-512.
  3. This hash is then iterated over itself according to the number of times specified in the spinCount attribute, which was 100,000. This step is performed to slow down brute force attempts to find the password.
  4. The hashing process in the previous step came close to generating the user's encryption key, but that hashing process generated a 512-bit output. Therefore, the hash function's final output is truncated to match the keyBits attribute's value, measured in bits. This truncated value is the user's encryption key.
  5. A random array of bytes is then created that is the size specified in the keyBits attribute of the "keyData" element. This is referred to as the intermediate key and in this case it was a 256-bit key which was generated.
  6. The OneNote section is then encrypted with the cipher algorithm specified in the keyData element's cipherAlgorithm attribute, which is AES in this case. The initialization vector for this encryption process is the keyData element's saltValue and the intermediate key generated in Step 5 is used as the encryption key. All blocks in the encryption process are the size specified in the keyData elements' blockSize attribute, measured in bytes.
  7. Finally, after encryption has completed, the intermediate key is stored in the p:encryptedKey element's "encryptedKeyValue" attribute. To ensure it is stored safely, the intermediate key is encrypted with the cipher specified in the p:encryptedKey element's "cipherAlgorithm" attribute. This encryption process uses the user's encryption key generated in Step 4, with the keyEncrypter elements's "saltValue" attribute as the initialization vector.

Note from the process above that the user's password is not used to directly generate the key which is responsible for encrypting the OneNote section. Instead, the user's password is used to generate an encryption key which is used to encrypt a random value generated to be used as the OneNote section's encryption key.

For the curious, the encryptedVerifierHashInput and encryptedVerifierHashValue attributes are used for verifying the user's password before starting the decryption process. The encryptedVerifierHashInput value is created by generating a random value the same size as the saltSize, then encrypting it with the user's encryption key. The hash of that decrypted random value is then encrypted with the user's encryption key. To validate the user's password before decrypting, the encryptedVerifierHashInput value is decrypted and hashed, then compared to the decrypted value of the encryptedVerifierHashValue attribute.

Finally, for the observant cryptography enthusiast, you may have noticed that I keep saying "user's encryption key" for all of these various encryption functions which have occurred (other than the intermediate key, of course). This would open up this encryption scheme to a number of attacks. For each of the encryption processes which occur to create the encryptedVerifierHashInput, encryptedVerifierHashValue, and encryptedKeyValue attributes, Microsoft actually specifies different blockKey values which must be hashed one more time with the final iteration of the spinCount hashing process. This creates unique encryption keys for each of these elements.

Now, let's examine what happens when we change the password of an encrypted section.

Password Change Behavior: Salts

As we can see in the screenshot below, a new saltValue is generated when a password has been changed, which means that the user's encryption key (used to encrypt the intermediate key) is changed as well. This prevents a number of attacks, but especially attacks where a malicious actor may have found the saltValue of the keyEncryptor in the document, then generated a large number of potential keys offline based on well-known passwords and come back to decrypt the file, only to find the saltValue had changed. This is certainly secure and proper behavior.

Additionally, salt values are changed when a section is copied, meaning that two sections do not have the same key protecting the intermediate key:

Password Change Behavior: Intermediate Keys

What is not immediately obvious in examining the encryption settings is whether or not the intermediate key is changed when the password is changed. Functionally, this does not need to occur because the user's password is used to encrypt only the intermediate key, not the document itself. Therefore, when a password is changed, OneNote can simply decrypt the intermediate key with the old password and encrypt it with the new password, then keep using it for the purpose of protecting the OneNote section.

The TechNet article states that for Excel, PowerPoint, and Word, the default is to not generate a new intermediate key when a password is changed, but it makes no mention of other Office products.

In order to determine whether or not the intermediate key is changed and the section is re-encrypted after a password change, I did a password change and compared the body sections from before and after.

Before:

After:

Those of you with excellent eye sight can see that the body cipher text is completely different, indicating that a password change does indeed cause the generation of a new intermediate key and a re-encryption of the section.

Conclusion

Microsoft has clearly improved the default encryption settings and behaviors in OneNote 2013 over previous version. OneNote 2013, at least when installed through the Office 365 Home program as I have done, by default:

  • Encrypts sections with AES-256
  • Uses SHA-512 for hashing operations
  • Iterates the hashing of the user's password 100,000 times before using it as an encryption key
  • Creates a random byte array to use as the section's actual encryption key, called the intermediate key
  • Only uses the user's password to create a key to encrypt the intermediate key
  • Changes salt values when the section's password is changed
  • Appears to change the intermediate key and re-encrypt the section when the section's password is changed

The design of encryption in OneNote 2013 clearly exceeds common industry practices for secure cryptographic implementations.

Apple in the Enterprise: Securely Connect iOS and OS X to a Windows Server 2012 VPN

Reasons for Setting Up a VPN for Your Company

While it can sometimes be difficult to get Apple and Microsoft to integrate well in the enterprise, the consumerization of technology has driven the need to explore this space. As mobile technologies are certainly going to gain even further in popularity, it is important for workers to be able to access office resources from remote locations and have a method of protecting their communications when connected to insecure Wi-Fi hotspots. For these reasons and many more, it is imperative that even small businesses have some sort of VPN technology that works across the range of devices used throughout their business.

Many VPN solutions exist, but for those companies that cannot afford a high-end Cisco or Juniper solution, a regular Windows Server 2012 installation can be used to provide VPN access into your network. Of course, there are many considerations around secure placement of a VPN solution on your network and these considerations will be discussed in another article. For now, know that putting a VPN server on your network involves exposes some internal resources to the outside world and this should only be done cautiously. Remember to always patch your servers!

Due to the limited overlap in VPN protocol support between Microsoft and Apple, we will be using L2TP as the VPN protocol in this scenario. There are three steps to complete the setup process:

  1. Configure VPN on the Windows Server 2012 system using the Routing and Remote Access service. While I will be writing "Windows Server 2012" throughout this post, the same steps will work on Windows Server 2012 R2. This post assumes that the Server 2012 system being used is part of a small Active Directory domain.
  2. Forward ports on the perimeter router to the Server 2012 system.
  3. Configure VPN connections on OS X and iOS devices.

Configure Windows Server 2012 and Port Forwarding

Install Necessary Server Roles for VPN

  • Prerequisites:
    • Windows Server 2012 or 2012R2 system which has two NICs installed and configured with static IPs,
    • Be logged onto this system with a Domain Admin account.
  • Install the "Remote Access" and "Network Policy and Access Services" roles.
    • When selecting the role services for Network Policy and Access Services, only "Network Policy Server" needs to be installed.
    • When selecting the role services for Remote Access, only "DirectAccess and VPN (RAS)" needs to be installed.

Configure VPN in Routing and Remote Access

  • In Server Manager, select Remote Access, right-click your server, and open the Remote Access Management Console. In that console, click "Run the Remote Access Setup Wizard."


  • Choose "Deploy VPN Only," which will bring up the Routing and Remote Access window.
  • Right-click the server and choose "Configure and Enable Routing and Remote Access"


  • On the "Configuration" screen of the wizard, choose the first option, "Remote access (dial-up or VPN)" and click Next.
  • Select the "VPN" check box on the "Remote Access screen, then click Next.
  • On the next page, "VPN Connection," you must select a network interface which will receive incoming VPN traffic from the Internet. Since we are setting up this VPN server behind a NAT router, you can select either interface as long as the traffic is forwarded to that interface from the router.
    • Also, you can uncheck the box, "Enable security on the selected interface..." because this filtering is unnecessary when the server is behind a NAT router. It is certainly more secure to have Static Filters enabled to restrict this interface to only VPN traffic, but in a small business environment where this server may be sitting in the same network segment as other servers, the Static Filters might make management unnecessarily difficult. Click Next.
  • If you have a DHCP server on your network, select the "Automatically" option to use that DHCP server to assign addresses to VPN clients. Click Next.
  • Choose the "No, use Routing and Remote Access to authenticate connection requests" option. This will force the VPN to use the Network Policy Server which was installed alongside the VPN role to authenticate and authorize VPN connections. Click Next, then click Finish.
    • Note: If you receive an error saying that the system could not be registered as a valid remote access server within Active Directory, you must manually add the computer object as a member of the "RAS and IAS Servers" group. Membership in this group allows servers to access the remote access properties of user objects.
  • Right-click the server in the Routing and Remote Access window and select "Properties."


  • On the Security tab of the Properties dialog, check the option for "Allow custom IPsec policy for L2TP/IKEv2 connection" then enter a Preshared Key. This preshared key will be used by VPN clients to authenticate the VPN server. Click OK to close the dialog and apply the settings.

Configure Users and Groups for VPN Access Authorization

Since this guide is meant for a small organization with an Active Directory domain, we can use Active Directory Users and Groups to control the authentication and authorization for VPN access. To do this, simply:

  • Create a new Active Directory group, called "VPNUsers" for this example, and populate it with the users that will be able to use the VPN.
  • In order for this to work, all Active Directory users must have the "Control access through NPS Network Policy" option selected on the Dial-in tab of each user's properties dialog. Fortunately, this is the default option, so no work needs to be done unless changes were made to those user attributes prior to implementing this VPN.

Configure Authentication and Authorization Policies in Network Policy Server

  • Back in the Routing and Remote Access window, click the "Remote Access Logging & Policies" folder under the active server. Then, right-click and select "Launch NPS."
  • Right-click Network Policies and select New.
  • Name the policy "L2TP," leave the rest of the defaults on this first page, then select Next.
  • On the Specify Conditions page, click Add, and select Tunnel Type. In the resulting dialog, select "Layer Two Tunneling Protocol (L2TP)" and click OK.
  • Still on the Specify Conditions page, click Add, and select User Groups. In the resulting dialog, select Add Groups and add the "VPNUsers" group we created in the last section. Click Next.
  • Make sure this policy is set to Grant Access to the network. Click Next.
  • On the Configure Authentication Methods page, make sure the only check box selected is "Microsoft Encryption Authentication version 2 (MS-CHAP-v2)." Click Next.
  • On the Configure Constraints page, set the Idle Timeout to 120. Click Next.
  • On the Configure Settings page, go to the Encryption section and make sure only the check box for "Strongest encryption (MPPE 128-bit)" is selected. Click Next, then click Finish.

When NPS has been configured completely, there should be a policy with the following settings:


Forward VPN Ports to Server

In order to get this VPN working, traffic needs to be able to get to the VPN server from the Internet. To do this, configure your router to forward any UDP traffic on the following ports to your VPN server:

  • 500
  • 4500
  • 1701


Setup OS X and iOS Clients to Use VPN

Configure OS X to Connect to VPN

This configuration was done on OS X 10.10. There are some older versions of OS X (at least 10.6) which implemented L2TP using non-standard network ports and, therefore, will not work with this VPN solution. However, I believe all newer versions of OS X have been implemented with standard ports. You need to be able to administer your OS X installation to set this up.

  1. Open System Preferences and go to the Network panel.
  2. On the bottom left, click "+" to add a new network connection. In the resulting dialog, change the Interface to VPN. Make sure "L2TP over IPsec" is selected as the VPN Type. Change the Service Name to a descriptive name, then click Create.
  3. Select the new VPN connection and fill in the following settings:
    1. Server Address should be filled in with the IP address or FQDN of your external interface.
    2. Account Name should be filled in with the Active Directory username you will use to connect to the VPN. Remember that this account must be a member of the "VPNUsers" group for it to be authorized to connect.
  4. Click "Authentication Settings..." and fill in the following settings:
    1. Under User Authentication, "Password" should be filled in with the Active Directory account's password.
    2. Under Machine Authentication, the "Shared Secret" should be setup with the Shared Secret that was defined on the Security tab of the remote access server properties dialog.
    3. Click OK to close the dialog.
  5. Click "Advanced..." and make sure the "Send all traffic over VPN connection" option is selected. This will ensure that all traffic is protected by the VPN's encrypted tunnel. Click OK to close this dialog.
  6. Click Apply.
  7. To connect, you can click "Connect" in this page or select the option to show the VPN status in the menu bar. You can then control the VPN connection from that menu bar icon.

Configure iOS to Connect to VPN

This configuration was performed on iOS 8, but the configuration should work on older versions of iOS as well.

  1. Open Settings.
  2. Select VPN.
  3. Click "Add VPN Configuration..."
  4. Select "L2TP" at the top.
  5. Fill in the following:
    1. Description: a description of the connection
    2. Server: the FQDN or IP address of the VPN's external interface
    3. Account: the name of the Active Directory account that can access the VPN
    4. RSA SecurID: make sure this option is unselected
    5. Password: password of the Active Directory account
    6. Secret: Shared Secret configured in the remote access server properties
    7. Send All Traffic: make sure this option is selected.
  6. Click Save.
  7. To connect, simply make sure the appropriate VPN configuration is selected, then click the button near the top of the screen.

Protecting Your Data in the Cloud: Using GnuPG for File Encryption on OS X

Storing files in the cloud is easy and very convenient, but it comes with inherent dangers. The biggest danger of storing data in the cloud is the fact that you cannot control the manner in which it is stored. This means that you have no control over the countermeasures employed to prevent unauthorized access to or modification of your data. While cloud storage companies may make claims about their security measures, there is no way for the average consumer to have a measure of absolute assurance that these security measures are in place. For this reason, it is important that you implement your own countermeasures for any sensitive data you choose to put in cloud storage.

When most people think of protecting data, they think of encrypting it. There are some easy and automated ways to encrypt data for storage in the cloud, but in this post I will be examining one method of encrypting individual files that is a little more manual but very effective and based on open standards. Specifically, the PGP standard will be used, as implemented in various GnuPG packages.

Encrypting Files on OS X Using GnuPG

  1. Go to the GnuPG.org downloads section and follow the link to the Mac GPG binary release.
  2. Download and install the latest GPG Suite. For this post I downloaded the Yosemite Beta, so I apologize if any of the functionality is different for previous versions of OS X.
  3. Following the installation, open GPG Keychain Access. This is an easy GUI-based control panel for managing keys.
  4. Click "New" in the upper left corner of the window. In the resulting panel, fill in your name and email address. If you would like to encrypt email through the Mail app on OS X, make sure your email address in this panel exactly matches how the email address is setup in the Mail app settings, including case sensitivity. In "Advanced options," the default key type is fine but ensure that the key length is 2048 bits at minimum. 4096 bit keys are the strongest you can create, if you would like, and devices are now so powerful that this should not create any significant load.
  5. Once these options have been selected, click Generate Key. Enter a passphrase for the key. If you forget this passphrase, it cannot be retrieved and you will lose the ability to use the key.
  6. Now that a public/private key pair has been created, you can use this to encrypt and decrypt files. In order to encrypt a file on OS X, right-click on a file, go to Services, and click "OpenPGP: Encrypt File."
  7. In the "Choose Recipients" window, select the Secret Key you just created and make sure the "Add to Recipients" box is selected. Click OK and enter the passphrase for the key.
  8. The resulting encrypted file will have a ".gpg" extension. This file can then be uploaded to a cloud service for storage. The original unencrypted file will remain in the filesystem, so it is up to you whether or not you want to keep that file.
  9. The .gpg file can be unencrypted by right-clicking, going to Services, and clicking "OpenPGP: Decrypt File."

The key to using this method for encrypting files for cloud storage is ensuring that the file never exists in the cloud unencrypted. This is simple to do when only using the web client because you can just choose to upload and download the .GPG file. However, when using a local sync client, it is very easy to accidentally upload an unencrypted file to the cloud service because the files encrypt and decrypt in the same folder. Therefore, you must take some precautions when using this method with a local sync client. Make sure that only the encrypted version of the file ever exists in the sync folder. This will involve a good amount of copying and pasting, but it is necessary when using this method to encrypt sensitive data in cloud storage.

Protecting Your Data in the Cloud: Don't Use TrueCrypt

Despite the recent discontinuation of TrueCrypt development under suspicious circumstances, TrueCrypt remains the preferred method of many people for creating encrypted storage containers. However, some of the characteristics of TrueCrypt containers that make them great for protecting your data also make them difficult to use with cloud storage services.

One of these characteristics is that TrueCrypt does not modify the timestamps of a container whenever its contents are changed. This is great for concealing actions taken surrounding your data, but it does not allow cloud storage sync clients that rely on the "Modified" timestamp to determine whether or not a file needs to be resynced to the cloud. OneDrive, my preferred cloud storage provider, is one of these services.

Here is how I tested this:

  • I created a new, empty TrueCrypt container and placed it in my local OneDrive folder to be synced to the OneDrive service. Below, you will see the file with its accompanying timestamps and SHA-1 hash.
  • I opened the OneDrive sync client and forced a sync to make sure it had checked for any changes and synced changed files.
  • I mounted the container, created a test text file in the container, then unmounted the container. Below, you will see the container file with its updated SHA-1 hash, proving it has changed. However, the timestamps are clearly the same as when the file was created.
  • After forcing a sync again through the OneDrive client, I went to the OneDrive website and downloaded the container file that was stored there.
  • Mounting the downloaded container file showed that the container was still empty, as it was when the original file was synced to the OneDrive service.

This clearly shows that the OneDrive sync client relies on the "Modified" timestamp rather than file hashes to determine which files have changed and need to be synced back to the cloud service. Of course the workaround here is to use the OneDrive website to manually upload any TrueCrypt containers that have been changed, but that is clearly an inconvenience.

In future posts, I will be exploring other methods of protecting your data in the cloud.

OS X and Active Directory Integration: Kerberos TGT Renewal

Results of a klist command showing an expired TGT

Results of a klist command showing an expired TGT

It takes a little work to get OS X working completely with Active Directory, and one of the issues that will confound users is the use of Kerberos within OS X. Apple has built Kerberos into OS X so that it will work out of the box, although this functionality most likely comes from OS X's BSD origins and not from any type of groundwork truly done by Apple. Mostly, Kerberos works as intended.

The one frustrating component of OS X's Kerberos implementation is that it will not auto-renew an expired Ticket Granting Ticket (TGT) by default. Since many users do not actually log out of their desktops at the end of the day and log back in later, it is common for an OS X system with default settings to expire a user's TGT and cause users to be presented with password prompts when attempting to access various resources. There are two methods of overcoming this limitation:

  1. Open Terminal and use the 'kinit' command. This will prompt you for your user password, then use this credential to request a new TGT.
  2. In System Preferences -> Security & Privacy -> General, set the option "Require password after sleep or screen saver begins" to "Immediately." When you wake your computer from sleep, activate the screen saver with a hot corner, or return to the computer after the screen saver has activated, the system will prompt you for your credentials. Once you authenticate, the system will use the credentials to renew your TGT if it has expired.

For the average user, option 2 will obviously be easier. If you are using some sort of device management solution, you can enforce the sleep or screen saver re-authentication setting for all users. Of course this has security benefits other than just allowing users to use Kerberos, so enabling this should be a no-brainer.

OS X and Active Directory Integration: Directory Utility Options

I'm doing some work right now fixing a mixed environment of OS X and Windows machines that was poorly designed and deployed. The options for directory integration on OS X are poorly documented and confusing, so I am going to do my best to document the behavior of these options here.

The first step in performing directory integration with an OS X client is to join the client to the Active Directory domain. To do this, open System Preferences, navigate to Users, then Login Options, press Edit next to "Network Account Server," then select Directory Utility. In there, you will be asked to enter the name of the domain you want to bind to and once you select Bind, you will need to enter proper domain credentials. This is the obvious part, however.

The non-obvious part which requires explaining are the various combinations of options surrounding the "Create mobile account at login" and the "Force local home directory on startup disk" settings. The following explanations assume the user has a network home folder path specified in their AD user account and the "Use UNC path from Active Directory" option is set. As far as I understand it at the moment (I will update this post as my understanding grows), these are the results of the various settings combinations:

  • Create mobile account ON/Force local home directory ON: A local copy of the user's network home folder is created, which acts as the user's profile in /Users. The local copy is synced with the network copy at login, logout, and intermittently in between. Depending on the size of the user's profile, this can cause long login or logout delays.
  • Create mobile account OFF/Force local home directory ON: This creates a local home directory separate from the user's network home folder. The network home folder is mounted in Finder separately.
  • Create mobile account OFF/Force local home directory OFF: This combination serves the user's profile from a network home folder. If a profile is not present on the network home folder, then functionality on the Mac will be severely degraded since the user will not have a profile to work in. This saves space and generally decreases login/logout time, but increases network traffic and can be difficult to setup. I do not know if this option will work at all if Mac clients are running different versions of OS X since the profiles that need to be served may differ.

My current testing situation involves by OS X 10.9 clients and servers, along with a Windows 2008R2 Active Directory domain. I'll be writing more clarifying posts as time goes on.

Configuring Active Directory Certificate Services and Auto-Enrollment

CA.JPG

This guide shows how to setup Active Directory Certificate Services (ADCS), certificate auto-enrollment, and an OCSP responder. It was originally supposed to be a rather thorough guide, but then the test server I had blew up for some reason, so I am going to refer you to the Microsoft TechNet guide and make notes of items which I believe they missed and problems I ran into. This will allow me to focus more on describing configuration of certificate templates and certificate auto-enrollment, rather than spending a painstaking amount of time recreating a guide for installations which already exists.

The original point of me setting up ADCS was to support an IKEv2 VPN, which requires the VPN server to have a certificate. Setting up Remote Access on Windows Server 2012 will be the subject of the next guide I write. For now, we will setup ADCS as a basic piece of infrastructure to support authentication services across our domain.

Prerequisites for Installing Active Directory Certificate Services

This guide uses Windows Server 2012 for all of the servers involved.

  • Two separate servers are required.
    • Domain controllers are generally best left to their intended functions and cannot perform optimally, or most securely, when running other services as well. ADCS should also be run by itself because this server will contain your new Certificate Authority's private key. If your private key is compromised, then certificates can be issued on your CA's behalf and the integrity of your PKI infrastructure is completely compromised.
    • Setup a domain using AD Directory Services. For this guide, we will be using a domain named Wildwest.lan.
    • Install Windows Server 2012 on a separate system from your domain controller.
    • A testing workstation will also be required.

Installing and Performing Basic ADCS and OCSP Configuration

Follow this excellent step-by-step guide written on Microsoft TechNet for an in-depth explanation of installing and configuring a basic ADCS and OCSP setup. This will create the basic infrastructure for the configuration steps I will discuss next. At Step 3, only create the OCSP Response Signing template and I will discuss creating and using other templates below.

Obviously this guide was written for Windows Server 2008, but the steps are still applicable to Windows Server 2012 as long as you are familiar with the GUI and process differences between the two operating systems.

Configuring User Certificate Auto-Enrollment

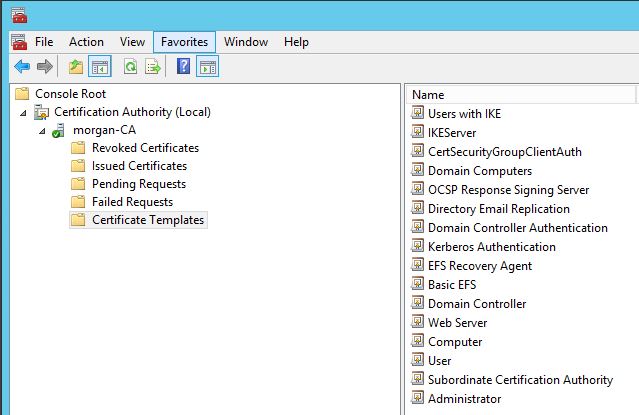
  • New certificate templates should always be created. Do not customize a preexisting, built-in template. Go to the Certificate Templates part of the Certification Authority snap-in and duplicate the User template. Rename this certificate to something descriptive of your choosing.
  • By default, this template allows the certificate to be used for Client Authentication, Encrypting File System, and Secure Email. If you do not have email setup within your domain, you should go to the Extensions tab and remove "Secure Email" from the Application Policies section.
  • Additionally, if you do not populate the "Email" attribute of your user accounts in your domain, then you should go to the Subject Name tab and uncheck "Include e-mail name in subject name" and "E-mail name." If you do not uncheck these options, then certificate auto-enrollment will not occur because your users' Subject Names will not be able to populate correctly.
  • Go to the Security tab. If all of your domain's users will have their certificates auto-enrolled with this template, then select the Domain Users group and ensure that "Read," "Enroll," and "Autoenroll" permissions are all assigned to that group. If you only want a subset of users to have their certificates auto-enrolled, then make a new Global Security Group, add the users to that group, then assign the above permissions to that group within the certificate template.
  • Click OK to save the template.
  • Go back to the Certificate Templates folder in the Certification Authority MMC snap-in. Right click in the right-hand pane, select New -> Certificate Template to Issue. Select the new certificate template you just created and select OK to publish the certificate template to Active Directory.
  • In order for Certificate Auto-Enrollment to work, you need to add a GPO setting. It is, of course, easiest to add this setting in the Default Domain Policy because it will apply to every object in the domain, but you can add it add a more granular level if necessary. The setting that needs to be Enabled is: Computer Configuration -> Policies -> Windows Settings -> Security Settings -> Public Key Policies -> Certificate Services Client - Auto-Enrollment Settings -> Automatic certificate management. I also enabled the two sub-options to allow most certificate options to be managed automatically from AD.

A Note About Publishing Certificates in Active Directory

There is an option on certificate templates to publish certificates in AD once they have been generated. Obviously, this will only publish your public certificate to AD since your private certificate must be kept secret at all times. This publishing option is used for instances when it is necessary to have your public key available for others' consumption when they are not opening a point-to-point direct communication with you, such as when secure email through S/MIME is in use in your organization. However, unless there is a specific usage for this publishing, certificates are generally not published to AD.

The sub-option concerning publishing, "Do not automatically reenroll if a duplicate certificate exists in Active Directory," is useful when you want a certificate to be restricted only to a single instance because it will prevent a new certificate from being issued if one already exists in AD with the same information for that object. For instance, if a server certificate template is created where you know that issued certificates will not be reissued until they expire, then checking this option will prevent accidental or malicious duplication of certificates. However, user certificates generally do not have this option selected because it would prevent users from moving from to different computers and having certificates automatically enrolled there.

Choosing Key and Hash Strength

Modern certificates of well-known corporations generally use a key length of 2048 bits and SHA1 as a hash. 2048 bits is a forward-looking key length that will likely be viable for the next 5-10 years. For the extremely paranoid or those with highly sensitive applications, 4096 bits is a future proof key length that is still not highly compute intensive for modern hardware. SHA1 is beginning to show its age, so even though this hash algorithm's integrity is still intact, it would not be inappropriate to use SHA256 as your certificate hash algorithm of choice.

Future Articles

This piece was meant to give a few tips about creating a simple AD CS deployment in your home or small business. By no means is this a comprehensive guide or appropriate for a large organization. In the near future, I will be writing about measures to secure your PKI infrastructure appropriately.